Установка virtualbox guest additions
Содержание:
- Download Page for virtualbox-guest-additions-iso_6.1.26-1_all.deb
- Enable Shared Folder
- How to Install Virtualbox Guest Additions in Linux Mint
- Issues[edit]
- Whonix ™-Default[edit]
- Почему вы должны использовать гостевые дополнения VirtualBox?
- Guest OS Installation
- Footnotesedit
- Установите гостевые дополнения VirtualBox в Ubuntu / Debian Linux
- Enable shared folders
- Set optimal framebuffer resolution
- What Do the Guest Additions Do?
Download Page for virtualbox-guest-additions-iso_6.1.26-1_all.deb
If you are running Debian, it is strongly suggested to use a package manager like aptitude or synaptic to download and install packages, instead of doing so manually via this website.
You should be able to use any of the listed mirrors by adding a line to your /etc/apt/sources.list like this:
deb http://ftp.de.debian.org/debian sid main non-free
Replacing ftp.de.debian.org/debian with the mirror in question.
You can download the requested file from the pool/non-free/v/virtualbox-guest-additions-iso/ subdirectory at any of these sites:
North America
- ftp.us.debian.org/debian
- http.us.debian.org/debian
- ftp.debian.org/debian
- ftp.ca.debian.org/debian
- ftp.mx.debian.org/debian
South America
- ftp.br.debian.org/debian
- ftp.cl.debian.org/debian
- download.unesp.br/linux/debian
- sft.if.usp.br/debian
- debian.torredehanoi.org/debian
Asia
- ftp.cn.debian.org/debian
- ftp.jp.debian.org/debian
- ftp.kr.debian.org/debian
- ftp.hk.debian.org/debian
- ftp.tw.debian.org/debian
Africa
debian.mirror.ac.za/debian
Europe
- ftp.de.debian.org/debian
- ftp.at.debian.org/debian
- ftp.bg.debian.org/debian
- ftp.ch.debian.org/debian
- ftp.cz.debian.org/debian
- ftp.dk.debian.org/debian
- ftp.ee.debian.org/debian
- ftp.es.debian.org/debian
- ftp.fi.debian.org/debian
- ftp.fr.debian.org/debian
- ftp.hr.debian.org/debian
- ftp.hu.debian.org/debian
- ftp.ie.debian.org/debian
- ftp.is.debian.org/debian
- ftp.it.debian.org/debian
- ftp.lt.debian.org/debian
- ftp.nl.debian.org/debian
- ftp.no.debian.org/debian
- ftp.pl.debian.org/debian
- ftp.ro.debian.org/debian
- ftp.ru.debian.org/debian
- ftp.se.debian.org/debian
- ftp.si.debian.org/debian
- ftp.tr.debian.org/debian
- ftp.uk.debian.org/debian
Oceania
- ftp.au.debian.org/debian
- ftp.wa.au.debian.org/debian
- ftp.nz.debian.org/debian
If none of the above sites are fast enough for you, please see our complete mirror list.
Note that in some browsers you will need to tell your browser you want the file saved to a file. For example, in Firefox or Mozilla, you should hold the Shift key when you click on the URL.
More information on virtualbox-guest-additions-iso_6.1.26-1_all.deb:
| Exact Size | 44836956 Byte (42.8 MByte) |
|---|---|
| MD5 checksum | 4c634ee21d870331d8b6ba6d07431905 |
| SHA1 checksum | Not Available |
| SHA256 checksum | 1a3238edd7ac69ccbe6c0f1353321d0c64e4d001770ae546c3cae7144e13fb77 |
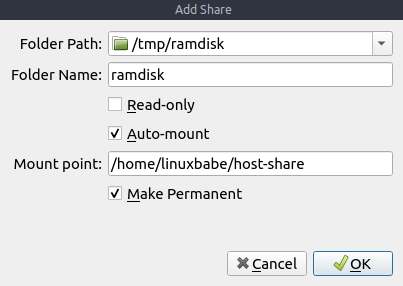
Now you can also share files between host and guest OS via the shared folder feature. Go to the virtual machine settings. In the left pane, select . Then click on the button to add a shared folder.
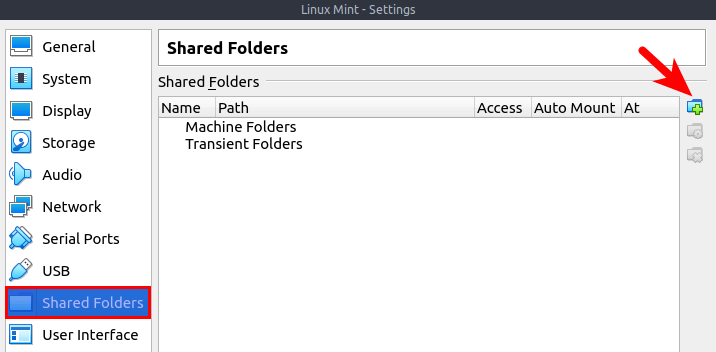
- In the field, select a folder on your host OS.
- Tick on the checkbox so that the shared folder will be automatically mounted to the guest OS when virtual machine boots up.
- In the Mount-point field, enter a path on the guest OS, such as a sub-directory in your user’s home directory.
- Tick on the checkbox.
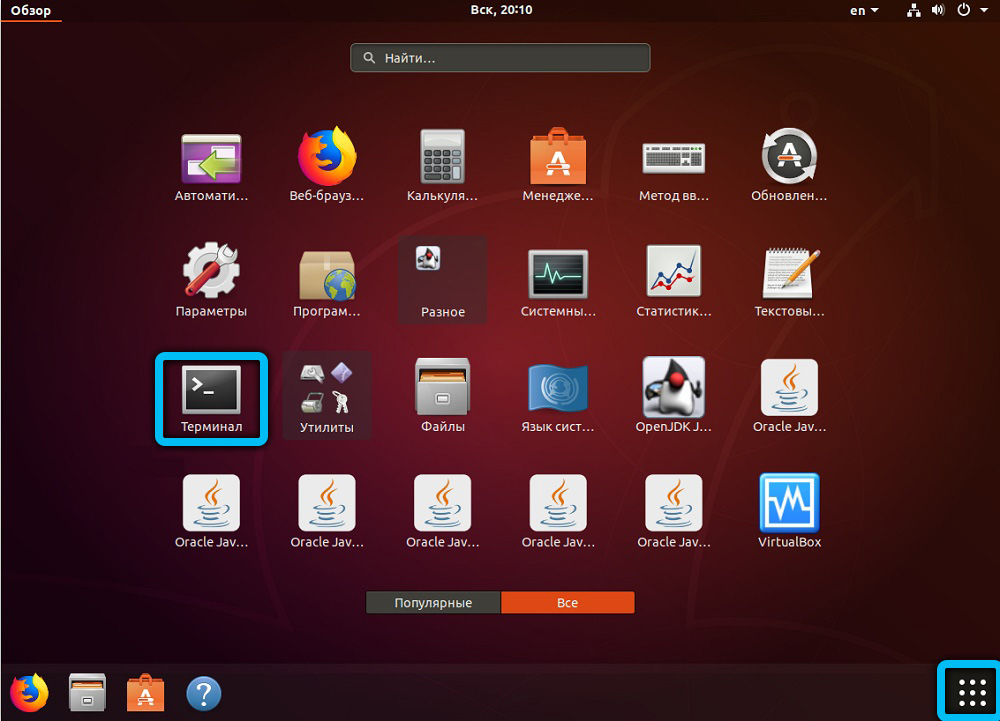
After saving the settings, you will find the shared folder appears in your home directory in the Linux Mint virtual machine, but only the root user and members of the vboxsf group have read and write access to this shared folder. So what we need to now is add your user to vboxsf group. Open up a terminal in Linux Mint and run the following command. Replace username with your real username.
sudo adduser username vboxsf
Log out of the current session and log back in. Now you should be able to access the shared folder.
How to Install Virtualbox Guest Additions in Linux Mint
Log into Linux Mint (guest OS) and run the following command in a terminal window to update software packages.
sudo apt update
sudo apt upgrade
Please note that if a new Linux kernel is installed in the upgrade process, then you need to reboot Linux Mint virtual machine. After that, run the following command to install required packages for building kernel modules.
sudo apt install build-essential module-assistant
Next, prepare Linux Mint for building kernel module with the following command.
sudo m-a prepare
Then in the VirtualBox window menu bar, select Devices > Insert Guest Additions CD image.
If your host OS already has the CD image, then you will be asked if you want to run the software. Select Run.
Then you will need to enter your password in order to install the guest additions.
Output in terminal window.
Verifying archive integrity... All good.
Uncompressing VirtualBox 6.0.10 Guest Additions for Linux........
VirtualBox Guest Additions installer
Copying additional installer modules ...
Installing additional modules ...
VirtualBox Guest Additions: Starting.
VirtualBox Guest Additions: Building the VirtualBox Guest Additions kernel
modules. This may take a while.
VirtualBox Guest Additions: To build modules for other installed kernels, run
VirtualBox Guest Additions: /sbin/rcvboxadd quicksetup <version>
VirtualBox Guest Additions: or
VirtualBox Guest Additions: /sbin/rcvboxadd quicksetup all
VirtualBox Guest Additions: Building the modules for kernel 4.15.0-55-generic.
update-initramfs: Generating /boot/initrd.img-4.15.0-55-generic
VirtualBox Guest Additions: Running kernel modules will not be replaced until
the system is restarted
Press Return to close this window...
Once the guest additions is installed, press to close the terminal window and restart your Linux Mint virtual machine. Now the resizeable display should be working. The screen resolution of Linux Mint VM will adjust with the size of VirtualBox window. You can press right Ctrl and F keyboard shortcut to enter full-screen mode. You can now also configure shared folder and bidirectional shared clipboard.
Issues[edit]
To document any problems, utilize the following short link to this wiki page: https://www.whonix.org/wiki/ga
Kernel Upgradesedit
The following issue is happening during kernel upgrades.
/etc/kernel/postinst.d/vboxadd:
VirtualBox Guest Additions: Building the modules for kernel 5.6.0-0.bpo.2-amd64.
Failed to rename process, ignoring: Operation not permitted
update-initramfs terminated by signal TERM.
Workaround in short: two reboots required.
Workaround details: This results in guest additions being non-functional after the next reboot. During the next reboot VirtualBox guest additions will automatically detect the missing kernel modules for the upgraded kernel and build them. Therefore when rebooting yet another time the issue should be resolved until the next kernel upgrade.
Please contribute to generic bug reproduction:
- Conceptually:
- Specifically: and .
See also Whonix specific technical information, .
One long term solution might be replacing initramfs-tools with dracut but that needs further research and development work. (develpoment discussion , issue )
Forum discussion:Guest additions fail to start after upgrade
Whonix ™-Default[edit]
Note:
- From VirtualBox v6+ it is no longer necessary to power off the virtual machine.
- For better usability, package shared-folder-help has already added user to group .
- Navigate to the shared folder settings of the virtual machine: → → →
- Click the folder icon that has a symbol in the upper right-hand section of the screen.
- → Navigate to the folder you want to share.
- → Type: . A different folder name can be utilized, but is recommended so it is the same as the example documented below — do not use (without the trailing )!
- Check if you do not want to write to that folder from within the guest.
- Check .
- → Leave as is (leave it empty and do not make any changes).
- Check (if that option exists).
- Press to close shared folder dialog.
- Press to close VirtualBox settings.
- The process is now complete and the shared folder can be used.
VirtualBox shared folders are found inside the virtual machine in folder .
By default, VirtualBox uses the prefix .
In the above example, the folder will become . It can be opened using a file manager like Thunar. To open it using the the command line, run.
cd /media/sf_shared
cd /media/sf_shared
Почему вы должны использовать гостевые дополнения VirtualBox?
С включенными гостевыми дополнениями VirtualBox использование виртуальной машины становится намного удобнее. Не веришь мне? Вот важные функции, которые предлагает гостевые дополнения:
- Интеграция указателя мыши: вам больше не нужно нажимать какие-либо клавиши, чтобы «освободить» курсор от гостевой ОС.
- Общий буфер обмена: с установленными гостевыми дополнениями вы можете копировать и вставлять данные между гостевой и хост-операционной системами.
- Перетаскивание: вы также можете перетаскивать файлы между хостом и гостевой ОС.
- Общие папки: Моя любимая функция; эта функция позволяет обмениваться файлами между хостом и гостем. Вы можете указать VirtualBox обрабатывать определенный каталог хоста как общую папку, и программа сделает его доступным для гостевой операционной системы как сетевой ресурс, независимо от того, есть ли у гостевой системы сеть.
- Улучшенная поддержка видео: пользовательские драйверы видео, которые устанавливаются с гостевыми дополнениями, предоставляют вам сверхвысокие и нестандартные режимы видео, а также повышенную производительность видео. Это также позволяет изменить размер окна виртуальной машины. Разрешение видео в гостевой системе будет настроено автоматически, как если бы вы вручную вводили произвольное разрешение в настройках дисплея гостевой системы.
- Бесшовные окна: отдельные окна, которые отображаются на рабочем столе виртуальной машины, могут быть сопоставлены на рабочем столе хоста, как если бы основное приложение фактически выполнялось на хосте.
- Общие каналы связи хоста/гостя: гостевые дополнения позволяют вам контролировать и мониторить действия гостевой системы. «Свойства гостя» предоставляют общий механизм на основе строк для обмена битами данных между гостем и хостом, некоторые из которых имеют особые значения для управления и контроля гостевой системы. Приложения могут быть запущены на гостевой машине с хоста.
- Синхронизация времени: благодаря гостевые системы будут регулярно синхронизировать время с хост-машиной. Параметры механизма синхронизации времени могут быть настроены.
- Автоматические входы в систему: это может быть полезной функцией.
Под впечатлением от функций, которые предоставляет гостевое дополнение? Давайте посмотрим, как вы можете установить VirtualBox Guest Additions в Ubuntu Linux.
Guest OS Installation
Install Guest Additions
VirtualBox Guest Additions is a collection of applications, libraries and kernel modules/drivers that are installed in your Guest OS. These provide support for graphics, networking, and other features such as file transfer and Guest access to real physical devices such as a USB flash drive.
Funtoo or Gentoo Linux Guests
Following the successful installation of you Funtoo Linux Guest OS (that is within a Virtual Machine), install the package .
root # emerge --ask app-emulation/virtualbox-guest-additions
Next, add your Guest OS Users to the group . For example, a user bob is added to
root # gpasswd -a bob vboxguest
Now add virtual-box-guest additions to the default runlevel of OpenRC.
root # rc-update add virtualbox-guest-additions default
Without having to reboot you can now start virtualbox-guest-additions within the Funtoo Guest OS with the command
root # rc
Microsoft Windows Guests
VirtualBox Guest Additions are installed in a Windows Guest by mounting a virtual CD-ROM image (.iso) within the guest virtual machine.
In your Host OS Funtoo Linux, confirm the version of VirtualBox installed:
For
user $ emerge --pretend --quiet app-emulation/virtualbox
 app-emulation/virtualbox-5.0.20
For VirtualBox versions 4.x (less than 5.0)
Under the earlier chapter , install (or ) with the USE flag enabled. This will provide the ISO necessary for installing Guest Additions within a Microsoft Windows guest.
For VirtualBox versions 5.0 and above
From version 5.0 the USE flag has been removed from the package app-emulation/virtualbox. The Guest Additions ISO required for a Windows-based Guest OS is now provided in a separate package, . Install this manually
root # emerge --ask app-emulation/virtualbox-additions
Warning
The package app-emulation/virtualbox-additions installs the Guest Additions ISO on your Host OS (Funtoo Linux). This is what you mount in a VM with Windows as a Guest OS. The package app-emulation/virtualbox-guest-additions is different. This is the Guest Additions that you install inside of a VM that happens to be a Guest OS of Funtoo Linux or Gentoo Linux.
The two packages perform different tasks so be sure to install the correct package!
Mount the Guest Additions ISO inside of your Microsoft Windows guest. Within Windows, browse to and install VirtualBox Guest Additions.
Footnotesedit
- Host -> Whonix-Gateway clipboard sharing enable by default?
-
https://forums.whonix.org/t/security-risks-of-virtualbox-shared-folders/10119
-
To learn more about VirtualBox shared folders, see: .
-
Admittedly, this recommendation does not have a strong rationale. Disabling additional features in other virtualizers or general applications will similarly lead to less code paths being utilized and arguably increasing security. VirtualBox software is not special in this regard.
- Because otherwise you cannot change VirtualBox VM settings.
- Using /lib/systemd/system/mnt-shared-vbox.service .
-
If the option is unavailable, upgrade VirtualBox.
-
Alternatively folder can be chosen. The VirtualBox default means that folder would be owned by owner and group .
-
This is specific to the VirtualBox version; newer versions do not have this option anymore.
Check if this setting should persist after restart of the virtual machine. Otherwise this setting will be temporary. -
This step is required. Quote :
-
Installation of VirtualBox guest additions from CD might also cause issues.
- http://www.webcitation.org/6HqJVN0br
- https://www.whonix.org/w/index.php?title=Ga&action=edit
Whonix is Supported by Evolution Host DDoS
Protected VPS. Stay private and get your VPS with Bitcoin or Monero.
Search engines: YaCy | Qwant | ecosia | MetaGer | peekier | Whonix Wiki
Follow:
Support:
Donate:
Please contribute by helping to .
This is a wiki. Want to improve this page? Help is welcome and volunteer contributions are happily considered! Read, understand and agree to , then Edit! Edits are held for moderation. Policy of Whonix Website and Whonix Chat and Policy On Nonfreedom Software applies.
Copyright (C) 2012 — 2021 ENCRYPTED SUPPORT LP. Whonix is a trademark. Whonix is a licensee of the Open Invention Network . Unless otherwise noted, the content of this page is copyrighted and licensed under the same Freedom Software as Whonix itself. (Why?)
The personal opinions of moderators or contributors to the Whonix project do not represent the project as a whole.
Whonix is a derivative of and not affiliated with Debian . Debian is a registered trademark owned by Software in the Public Interest, Inc .
Whonix is produced independently from the Tor anonymity software and carries no guarantee from The Tor Project about quality, suitability or anything else.
By using our website, you acknowledge that you have read, understood and agreed to our Privacy Policy, Cookie Policy, Terms of Service, and E-Sign Consent. Whonix is provided by ENCRYPTED SUPPORT LP. See Imprint, Contact.
Установите гостевые дополнения VirtualBox в Ubuntu / Debian Linux
Следует иметь в виду, что гостевые дополнения, как следует из названия, являются дополнениями гостевой ОС, а не хост-ОС. Следовательно, в этом случае гостевой ОС, работающей на виртуальной машине, является Ubuntu, производные Ubuntu (включая сервер Ubuntu), производные Debian или Debian (включая сервер Debian). Операционная система, на которой установлен VirtualBox, может быть любой.
Способ установки VirtualBox Guest Additions незначительно зависит от дистрибутива. В некоторых случаях, как только вы монтируете образ компакт-диска VBox Guest Additions ISO, вам будет предложено выполнить скрипт автозапуска. На других вы должны будете вручную настроить VirtualBox Guest Additions. Ручной метод установки гостевых дополнений VirtualBox в Debian и Ubuntu Linux показан здесь, так как он должен работать в большинстве случаев.
Сначала нам нужно установить пакет с именем . Это необходимо, чтобы Virtual Box продолжала работать с любыми обновленными ядрами в будущем. Возможно, вы уже установили его, но при попытке повторить попытку и запустить команду, приведенную ниже, нет никаких проблем
Далее вам не нужно скачивать компакт-диск VirtualBox Guest Additions. Все, что вам нужно сделать, это, когда запущено виртуальное устройство Ubuntu или Debian, перейти к ->, как показано на рисунке ниже. Это установит диск VBox Guest Additions для установки.
Загрузить образ компакт-диска VBox Guest Additions
В некоторых дистрибутивах Linux скрипт автозапуска открывается автоматически. В других случаях образ компакт-диска открывается и содержимое отображается в проводнике. Это то, что случилось с Xubuntu, который используется в этой демонстрации.
Открыть VBox Guest Additions CD
Теперь вы можете щелкнуть правой кнопкой мыши в пустом месте в проводнике и выбрать «Открыть терминал здесь». В некоторых других ничего не происходит после того, как вы вставите образ компакт-диска, и вам придется вручную открыть терминал и перемещаться по содержимому. Образ компакт-диска, как правило, монтируется под , где указано ваше имя пользователя и имя образа компакт-диска. В этой демонстрации путь:
Как только у вас откроется окно терминала и вы окажетесь в папке образа компакт-диска, вы готовы установить гостевые дополнения VirtualBox на гостевую ОС Ubuntu или Debian. Наконец, запустите установщик гостевых дополнений VBox, используя следующую команду:
Вот и все, просто сидеть и смотреть. Сценарий автоматически подготовит и установит гостевые дополнения VBox в Ubuntu / Debian.
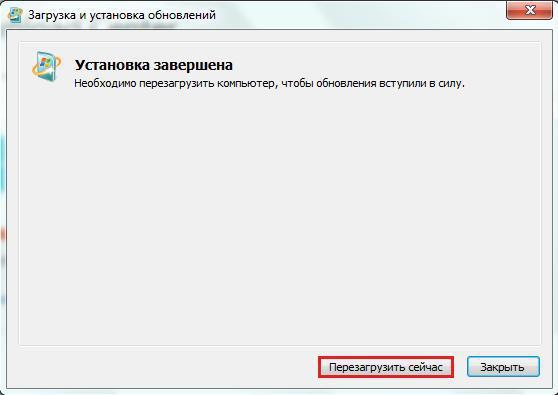
Установите гостевые дополнения VirtualBox в Ubuntu / Debian
После завершения установки перезагрузите гостевую ОС, и все готово. Теперь вы сможете запускать гостевую ОС в полноэкранном режиме, перетаскивать объекты между гостевой и хост-ОС, делиться буфером обмена и делать многое другое. На мой взгляд, если вы используете VirtualBox, то гостевые дополнения обязательно. VirtualBox также предлагает так называемый , который добавляет некоторые расширенные функции. Но большинству пользователей не нужен пакет расширений. Установите гостевые дополнения VirtualBox на гостевые ОС Ubuntu и Debian и наслаждайтесь повышенной производительностью и возможностями.
Источник записи: https://www.smarthomebeginner.com
No matter which method you will use to mount your folder, all methods require some steps first.
To avoid this issue , make sure the kernel module is properly loaded. It should be, since we enabled all guest kernel modules previously.
Two additional steps are needed in order for the mount point to be accessible from users other than root:
- the package created a group (done in a previous step);
- your user must be in user group.
Manual mounting
Use the following command to mount your folder in your Arch Linux guest:
# mount -t vboxsf -o gid=vboxsf shared_folder_name mount_point_on_guest_system
where is the Folder name assigned by the hypervisor when the share was created.
If the user is not in the vboxsf group, to give them access to our mountpoint we can specify the options and with the corresponding values of the user. These values can obtained from the command run against this user. For example:
# mount -t vboxsf -o uid=1000,gid=1000 home /mnt
Automounting
Note: Automounting requires the to be enabled/started.
In order for the automounting feature to work you must have checked the auto-mount checkbox in the GUI or used the optional argument with the command .
The shared folder should now appear as . If users cannot access the shared folders, check that has permissions or is owned by the group if using permissions . This is currently not the default if the directory is created by .
You can use symlinks if you want to have a more convenient access and avoid to browse in that directory, e.g.:
$ ln -s /media/sf_shared_folder_name ~/my_documents
Mount at boot
You can mount your directory with fstab. However, to prevent startup problems with systemd, should be added to . This way, the shared folders are mounted only when those mount points are accessed and not during startup. This can avoid some problems, especially if the guest additions are not loaded yet when systemd reads fstab and mounts the partitions.
sharedFolderName /path/to/mntPtOnGuestMachine vboxsf uid=user,gid=group,rw,dmode=700,fmode=600,noauto,x-systemd.automount
- : the value from the VirtualMachine’s Settings > SharedFolders > Edit > FolderName menu. This value can be different from the name of the real folder name on the host machine. To see the VirtualMachine’s Settings go to the host OS VirtualBox application, select the corresponding virtual machine and click on Settings.
- : if not existing, this directory should be created manually (for example by using ).
- / are directory/file permissions for directories/files inside .
As of 2012-08-02, mount.vboxsf does not support the option:
desktop /media/desktop vboxsf uid=user,gid=group,rw,dmode=700,fmode=600,nofail 0 0
Set optimal framebuffer resolution
This article or section is a candidate for merging with .
Typically after installing Guest Additions, a fullscreen Arch guest running X will be set to the optimal resolution for your display; however, the virtual console’s framebuffer will be set to a standard, often smaller, resolution detected from VirtualBox’s custom VESA driver.
To use the virtual consoles at optimal resolution, Arch needs to recognize that resolution as valid, which in turn requires VirtualBox to pass this information along to the guest OS.
First, check if your desired resolution is not already recognized by running the command ( need to be installed):
hwinfo --framebuffer
If the optimal resolution does not show up, then you will need to run the tool on the host machine and add «extra resolutions» to your virtual machine (on a Windows host, go to the VirtualBox installation directory to find ). For example:
$ VBoxManage setextradata "Arch Linux" "CustomVideoMode1" "1360x768x24"
The parameters «Arch Linux» and «1360x768x24» in the example above should be replaced with your VM name and the desired framebuffer resolution. Incidentally, this command allows for defining up to 16 extra resolutions («CustomVideoMode1» through «CustomVideoMode16»).
Afterwards, restart the virtual machine and run once more to verify that the new resolutions have been recognized by your guest system (which does not guarantee they will all work, depending on your hardware limitations).
Note: As of VirtualBox 5.2, might not show any output, but you should still be able to set a custom resolution following this procedure.
Finally, add a kernel parameter to set the framebuffer to the new resolution, for example:
video=1360x768
Additionally you may want to configure your bootloader to use the same resolution. If you use GRUB, see .
Note: Neither the kernel parameter nor the bootloader’s resolution settings (e.g. GRUB’s ) will fix the framebuffer, since they are overriden by virtue of Kernel Mode Setting. The framebuffer resolution must be set by the kernel parameter as described above.
What Do the Guest Additions Do?
Now that we know what Guest Additions are, let’s look at what the VirtualBox Guest Additions actually do for you.
Chances are that you’ll eventually want to move some content between your virtual machine (the guest) and your actual computer (the host). With the Guest Additions installed, VirtualBox packs a few features to make this easy.
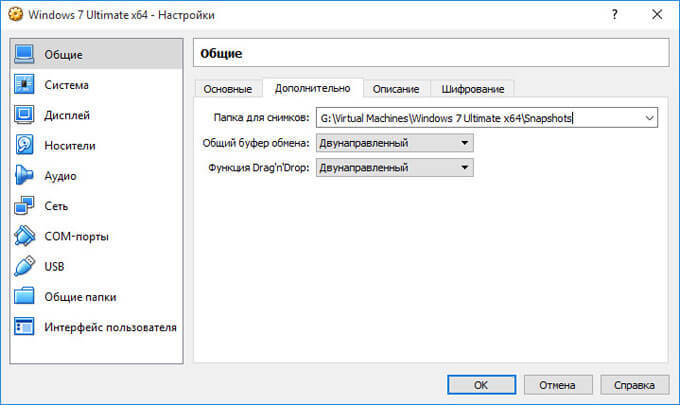
First is the shared clipboard/drag and drop support. This allows you to copy items on one platform and paste them on the other, as well as dragging files between them. To adjust this, select your VM on the VirtualBox home page and choose Settings.
In the General section, switch to Advanced tab and you can choose options for Shared Clipboard and Drag’n’Drop. You can choose Disabled, Host to Guest, Guest to Host, or Bidirectional for both of them.
Unless you have a specific reason to choose something else, Bidirectional is the most convenient.
Once you have this enabled, both copy/paste and dragging will work across systems.
If you’d rather make folders on your host system accessible in the VM, you can utilize shared folders. This Guest Additions feature lets you mount host folders as «network resources» in the guest OS without actually using a network.
To use it, click Settings on a VM and jump to the Shared Folders section. Select the Add Share button on the right side, then choose a folder on your computer to share with the guest.
Give it a name, choose Auto-mount if you want it to connect automatically, and hit OK.
Now, that folder will appear as a network drive in the guest OS.
3. Improved Graphics Support
As mentioned earlier, virtual machines don’t support high-resolution graphics from the start. Once you install the Guest Additions, though, you’ll have full control over the resolution options in the guest OS’s settings menu. For instance, if you have a 1920×1080 monitor, you can display the VM in full-screen at 1080p.
That’s not the only graphical enhancement that the Guest Additions add. Using them, the guest OS’s resolution will dynamically resize as you adjust the VirtualBox window on your computer. This lets you use the VM at any size you like without playing with resolution options.
Finally, with Guest Additions, the guest OS can take advantage of your computer’s graphics hardware. If you’re playing games or using other graphically intensive software in a WM, this makes a huge difference.
4. Seamless App Windows
Another neat benefit of the Guest Additions is a seamless mode. This lets you run app windows from the guest alongside apps from your host OS, so it feels like they’re all part of one system. It’s a lot like how Parallels runs Windows apps on a Mac.
To use this mode, press the Host key + L when your virtual machine is in focus. If you haven’t changed it, the default Host key in VirtualBox is the right Ctrl key.
Once you’ve done this, the VM will go full-screen and VirtualBox will remove its background. You’re then free to use its windows with your regular desktop software. Hit Host + L again to turn this off—if it doesn’t seem to work, make sure you select the VirtualBox VM first.
5. Other Benefits of VirtualBox Guest Additions
The above functions are the main features of VirtualBox’s Guest Additions. There are a few other useful perks to installing them, though these are not as generally useful.
One that may affect you, depending on the guest OS, is seamless mouse integration. With most modern OSes, VirtualBox allows you to seamlessly move your mouse between your host and guest system. However, some older OSes require exclusive control of your keyboard and mouse.
If this is the case, your mouse pointer will become «trapped» inside the VirtualBox window after you click inside it. This means that you must hit the Host key (right Ctrl by default) to bring the mouse control back to the host OS.
Otherwise, the Guest Additions bring time synchronization with your host machine, the option for automated logins, and can monitor communications between the guest and host. None of this has much use for the average user.