Css3. работа с тенями. часть 2
Содержание:
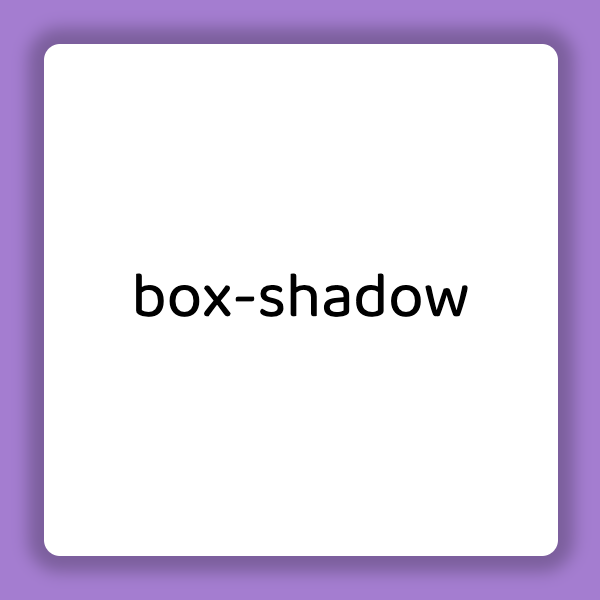
- Как сделать тень блока с помощью свойства box-shadow
- Syntaxe
- Property Values
- Примеры
- Ejemplos
- Demo
- Overview of box-shadow#
- Overview of border-radius#
- CSS Reference
- CSS Properties
- Sintaxe
- CSS Reference
- CSS Properties
- Compatibilidade com navegadores
- Вариации
- Расширенное задание параметров box-shadow
- Использование нескольких теней одновременно
Как сделать тень блока с помощью свойства box-shadow
Поддержка браузерами
1. Синтаксис свойства box-shadow
Свойство box-shadow прикрепляет одну или несколько теней к блоку. Свойство принимает либо значение none, которое указывает на отсутствие теней, либо список теней через запятую, упорядоченный от начала к концу.
Каждая тень является отдельной тенью, представленной от 2 до 4-х значений длины, необязательным цветом и необязательным ключевым словом inset. Допустимые длины ; опущенные цвета по умолчанию равны значению свойства color.
Свойство не наследуется.
Рис. 1. Синтаксис свойства box-shadow
| box-shadow | |
|---|---|
| Значения: | |
| x-offset | Задает горизонтальное смещение тени. Положительное значение рисует тень, смещенную вправо от текста, отрицательная длина — влево. |
| y-offset | Задает вертикальное смещение тени. Положительное значение смещает тень вниз, отрицательное — вверх. |
| blur | Задает радиус размытия. Отрицательные значения не допускаются. Если значение размытия равно нулю, то край тени четкий. В противном случае, чем больше значение, тем больше размыт край тени. |
| растяжение | Задает расстояние, на которое тень увеличивается. Положительные значения заставляют тень расширяться во всех направлениях на указанный радиус. Отрицательные значения заставляют тень сжиматься. Для внутренних теней расширение тени означает сжатие формы периметра тени. |
| цвет | Задает цвет тени. Если цвет отсутствует, используемый цвет берется из свойства color. Для Safari цвет тени указывать обязательно. |
| inset | Изменяет отбрасываемую тень блока с внешней тени на внутреннюю. |
| none | Значение по умолчанию, означает отсутствие тени. |
| initial | Устанавливает значение свойства в значение по умолчанию. |
| inherit | Наследует значение свойства от родительского элемента. |
Эффекты тени применяются следующим образом: первая тень находится сверху, а остальные — сзади. Тени не влияют на компоновку и могут перекрывать другие элементы или их тени. С точки зрения контекстов укладки и порядка рисования внешние тени элемента рисуются непосредственно под фоном этого элемента, а внутренние тени элемента рисуются непосредственно над фоном этого элемента (ниже border и border-image, если таковые имеются).
Если элемент имеет несколько ящиков, все они получают тени, но тени рисуются только там, где также будут нарисованы границы; см. box-decoration-break.
Тени не вызывают прокрутку или не увеличивают размер прокручиваемой области.
2.3. Тень в стиле «материальный дизайн»
See the Pen YpypeE by Elena (@html5book) on CodePen.
По материалам
CSS3-оформление текста
CSS3-переходы
Syntaxe
La propriété peut être définie grâce :
- À deux, trois ou quatre valeurs de longueur () :
- Avec deux valeurs, celles-ci sont respectivement considérées comme les coordonnées de décalage de l’ombre :
- Si une troisième valeur est fournie, celle-ci correspondra au rayon du flou :
- Si une quatrième valeur est fournie, celle-ci correspondra au rayon d’étalement : .
- Au mot-clé optionnel
- À une valeur de couleur () optionnelle.
- Si la valeur n’est pas définie (le cas par défaut), l’ombre sera une ombre portée (comme si la boîte était élevée au-dessus du contenu).
La présence du mot-clé modifie l’ombre afin qu’elle soit tournée vers l’intérieur du cadre (comme si le contenu était enfoncé dans la boîte). Les ombres tournées vers l’intérieur sont dessinées à l’intérieur de la bordure (même les transparentes), au-dessus de l’arrière-plan mais sous le contenu. - Deux valeurs de longueur ( qui permettent de définir le décalage de l’ombre. définit la distance horizontale du décalage et les valeurs négatives placeront l’ombre à gauche de l’élément. définit la distance verticale et les distances négatives placent l’ombre au-dessus de l’élément (cf. pour les différentes unités possibles).
Si les deux valeurs sont , l’ombre est placée derrière l’élément (et peut générer un effet de flou si et/ou est utilisé). - Une troisième valeur de longueur (). Plus cette valeur sera grande, plus le flou de l’ombre sera diffus : l’ombre sera donc plus étalée et plus légère. Les valeurs négatives ne sont pas autorisées. Si la valeur n’est pas définie, sa valeur par défaut est (le côté de l’ombre est rectiligne).
- Une quatrième valeur de longueur (). Les valeurs positives étaleront l’ombre et les valeurs négatives rétréciront l’ombre. Si elle n’est pas définie, la valeur par défaut est (l’ombre aura la même taille que l’élément).
- Une valeur de couleur (). Si la valeur n’est pas définie, la couleur utilisée dépend du navigateur ce sera généralement la propriété mais Safari affiche une ombre transparente.
Chaque ombre de la liste ( sera traitée comme une liste de longueur nulle) est interpolée via la couleur, le décalage horizontal et vertical, le rayon de flou et l’étalement (lorsque c’est pertinent). Pour chaque ombre, si les deux ombres sont ou ne sont pas , l’ombre interpolée doit respecter cette valeur. Si l’une des ombres a et l’autre non, la liste d’ombres ne peut pas être interpolée. Si les listes d’ombres ont des longueurs différentes, la liste la plus courte sera complétée à la fin avec des ombres dont la couleur est , toutes les longueurs valent et pour que la valeur corresponde à la plus longue liste.
none
où
où
où
où
Property Values
| Value | Description | Play it |
|---|---|---|
| none | Default value. No shadow is displayed | Play it » |
| h-offset | Required. The horizontal offset of the shadow. A positive value puts the shadow on the right side of the box, a negative value puts the shadow on the left side of the box |
Play it » |
| v-offset | Required. The vertical offset of the shadow. A positive value puts the shadow below the box, a negative value puts the shadow above the box |
Play it » |
| blur | Optional. The blur radius. The higher the number, the more blurred the shadow will be |
Play it » |
| spread | Optional. The spread radius. A positive value increases the size of the shadow, a negative value decreases the size of the shadow |
Play it » |
| color | Optional. The color of the shadow. The default value is the text color. Look at CSS Color Values for a complete list of possible color values.Note: In Safari (on PC) the color parameter is required. If you do not specify the color, the shadow is not displayed at all. | Play it » |
| inset | Optional. Changes the shadow from an outer shadow (outset) to an inner shadow | Play it » |
| initial | Sets this property to its default value. Read about initial | Play it » |
| inherit | Inherits this property from its parent element. Read about inherit |
Tip: Read more about allowed values (CSS length units)
Примеры
Пример
Добавить эффект размытия к тени:
#example1 { box-shadow: 10px 10px 8px #888888;
}
Пример
Определить радиус распространения тени:
#example1 { box-shadow: 10px 10px 8px 10px #888888;
}
Пример
Определить несколько теней:
#example1 { box-shadow: 5px 5px blue, 10px 10px
red, 15px 15px green;
}
Пример
Добавить врезное ключевое слово::
#example1 { box-shadow: 5px 10px inset;}
Пример
Изображения брошены на стол. В этом примере показано, как создавать «полароидные» изображения и поворачивать их:
div.polaroid { width: 284px;
padding: 10px 10px 20px 10px; border: 1px solid
#BFBFBF; background-color: white; box-shadow: 10px 10px 5px #aaaaaa;}
Ejemplos
En nuestro ejemplo, se incluyen tres sombras: una sombra interior, una sombra difuminada normal, y una sombra de 2px que crea un efecto de borde (podría haberse usado un en lugar de una tercera sombra).
Podrías dispararme con tus palabras,
podrías cortarme con tus ojos,
podrías matarme con tu odio,
y aún, como el aire, levantarme.
-Traduccion-
HTML
Cuando el , , y son todos cero, la sombra sera un contorno unifrome. Las sombras son dibujadas desde el fondo hasta el frente, así que la primera sombra se encuentra encima de sombras posteriores. Cuando el es 0, como por defecto, las esquinas de la sombra serán, bien, esquinas. De haberse definido un de cualquier otro valor, las esquinas habrían sido redondeadas.
Se ha añadido un margen del tamaño de la sombra más ancha para asegurarse de que la sombra no se superponga a los elementos adyacentes o vaya más allá del borde de la caja de contención. Una sombra de caja no afeta a las dimensiones del modelo de caja.
Demo
Have a look at the demo and compare the two different techniques we’ll be exploring. If the two examples look the same to you, that’s the point. The only difference is how we apply and animate the shadow. On the left we’re animating on , and on the right we’re adding a pseudo-element with , applying the shadow to that, and animating the of that element.
If you bring up your developer tools and hover one of these items, you should see something similar to this (green bars are paints; less is better):
There are clearly more re-paints when hovering the cards on the left side (animating ), compared to hovering the cards on the right side (which animate the of their pseudo-element).
Why are we seeing this effect? There are very few CSS properties that can be animated without constantly triggering repaints for every frame, namely and . We minimize the amount of repaints (and work that your browser has to do) by sticking to only changing these two properties during the animation.
This is the critical difference between the two techniques, stripping out all of the other layout styles:
In the example that performs better we have two layers: one for the box, and one for the shadow, and only animate the property of the shadow layer.
Overview of box-shadow#
Personally, upon it reaching decent support, the thing that made the most exciting for me was for popping models off the page in a far more native fashion
And for awhile, they were mission critical for what we called «skeumorphic design». And they made a bit of a comeback over the past year for «neumorphic design».
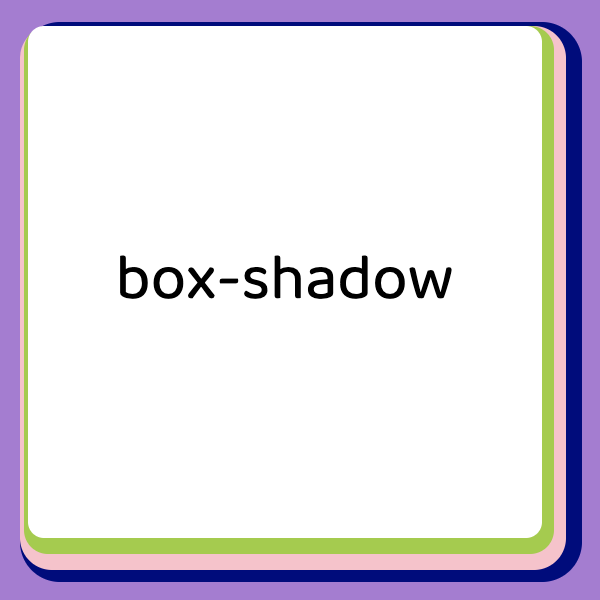
But what I usually use for these days is just a subtle hint at elevation for things like buttons or cards:

It is acceptable to omit the and , which leads to a sharper shadow due to loss of blur. The shadow will also not extend beyond the offset values since the spread is intended to scale beyond the element’s dimensions.
In the above example, we essentially gave the shadow a «light source» that was slightly above and left of the element which «cast» the shadow slightly right and below.
Instead, you can set the offsets to 0 for a shadow that is equal around the element, although at least is required. If is also supplied, that will apply scale to the shadow to extend it beyond the element’s dimensions:
I enjoy using to provide a custom visual state on buttons. Unlike , does not alter the elements computed dimensions, meaning adding or removing it does not cause either it or elements around it to shift from reflow. Check out the episode on buttons to see that method.
A unique feature of is the ability to apply multiples:
The «stacking order» is such that the first set is «on top», or visually closest to the element, and down from there. That’s why the has to be increased, else the «lower» layers would not be visible (except where the offset doesn’t overlap).
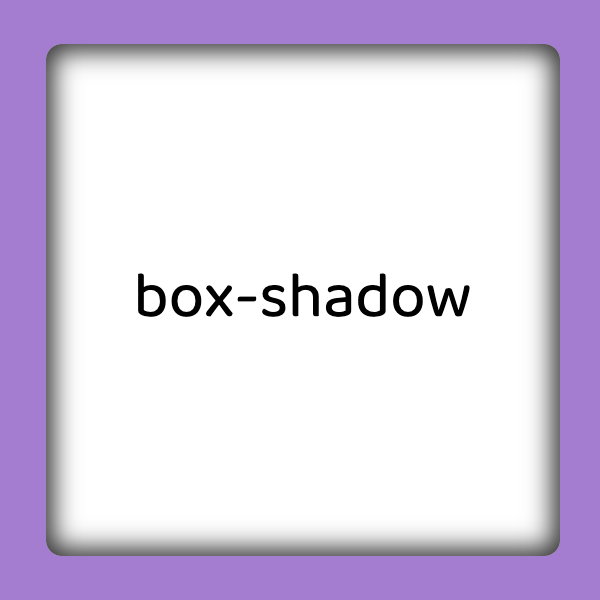
We can also flip to the inside of the element by adding the value:
These values will apply a very literal «inset» shadow appearance, where the element appears «sunk» into the page:
Hacks for Images
Two alternate ways I like to use shadows are for images.
The key is in the stacking order and the fact is placed above images applied via .
Vignette
The first is as a «vignette» which is a photography technique where the edges of the photo softly fade into the background. This helps highlight the subject of the photo particularly if the subject is centrally located.
However, the property cannot be directly used on an since it is considered an «empty» element, not a container element.
Going with a instead, the following CSS is applied to the container:
Here’s a comparison where the left image has the vignette applied and the right does not.

We used units so that the would scale relative to the overall image size which was also set in . This is due to the inability for to be set using percent, which makes it a little difficult to set values relative to the element. So the hack within a hack is to use viewport units to set expected size of the element to have more predictable results for the across viewport sizes.
Image Color Screen
I found this technique when I was using but also wanted a color «screen» — which means needing to place a translucent color fill over the image. This is a helpful technique to help defend the contrast of any text placed over background images, and also to create visual consistency among an otherwise unrelated set of images.
My previous solution — used for many years — was an extra absolutely positioned on the containing element with the screen color applied there as .
Here’s the new solution:
And a comparison with the screen on the left and without on the right:

Did you catch the hack? I mentioned that percentages aren’t allowed — but since viewport units are, we set the to which is likely to cover any element unless your element is greater than double the max-width or max-height of the viewport.
Hold up — why double? Because the is created from all sides of the element so it’s at least double the value. You can test it out by using the above value and setting your container to at least and see at what point the middle of the container is not covered.
If you’re using it for something more than a hero image, for example, just increase as needed, such as to .
If anyone is aware of taking performance hits for this, let me know!
Overview of border-radius#
Kids these days will never have to deal with creating a gif for each corner of a div that you want to appear rounded Truly, the release and eventual support of was one of the most significant milestones in CSS.
For a refresher, here’s how it’s often used:
Which for a square element will result in a circle appearance.
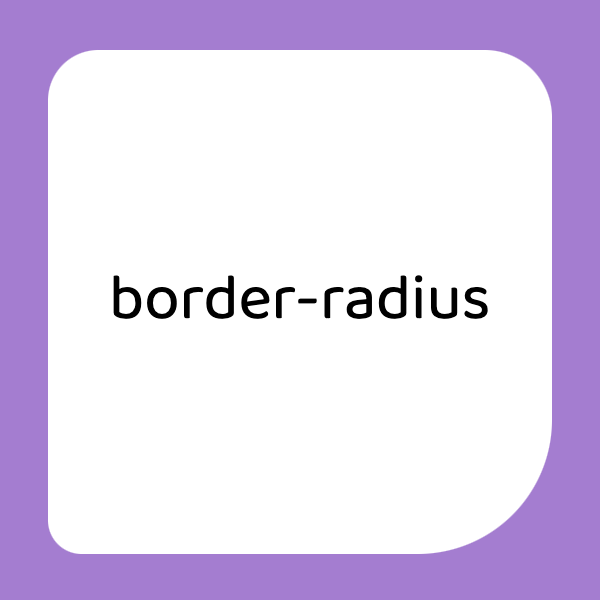
Or scale it back for just a slight roundedness to otherwise sharply square corners, such as for a button or card where you might use:
One way to begin to take this a bit further is to use two values, where the first value sets top-left and bottom-right, and the second value sets top-right and bottom-left:
Whiiiich… kind of looks like a lemon?
Now, given the same values but a different size div those results will vary quite widely:

We can also set all four corners:
But wait — there’s more!
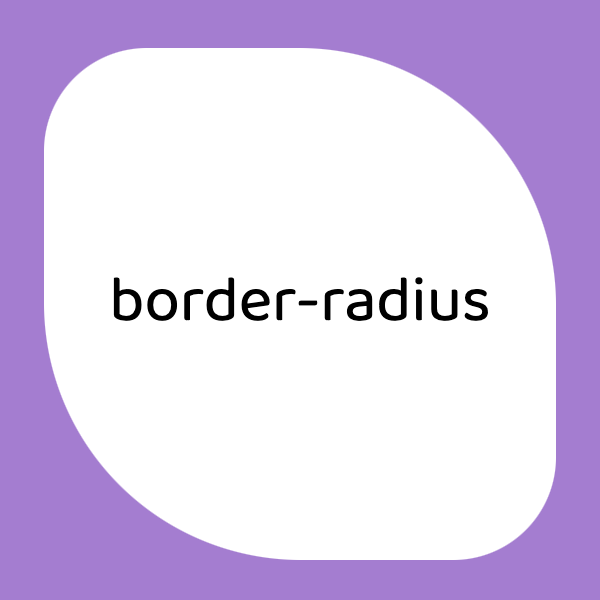
There’s a super uber expanded syntax which allows you to define both the horizontal and vertical radius each corner is rounded by. Whereas the default is rounded very circularly, adding the additional radius alters the «clipping» that occurs to produce the corner, allowing the trendy «blob» shapes:
There are a few more ways to define the syntax, you can check those out on the MDN docs.
Units for
Notice that we’ve used a few different units: , , and which is the «viewport width» viewport unit.
Percentage values are relative to the size of the element which means less predictability if the element is expected to be various sizes. For the example, once the element is no longer square it begins to appear more elliptical.
Absolute units such as or are preferred when you want consistent results not based on the element but based on perhaps design specs.
Relative units such as viewport units or can be beneficial if you want consistency but also an element of scale:
- viewport units will compute to be larger on «desktop» and smaller on «mobile» but remain consistent in rounded appearance
- will vary based on , resulting in more rounded corners on elements with larger fonts and less rounded corners on elements with smaller fonts
CSS Reference
CSS ReferenceCSS Browser SupportCSS SelectorsCSS FunctionsCSS Reference AuralCSS Web Safe FontsCSS AnimatableCSS UnitsCSS PX-EM ConverterCSS ColorsCSS Color ValuesCSS Default ValuesCSS Entities
CSS Properties
align-content
align-items
align-self
all
animation
animation-delay
animation-direction
animation-duration
animation-fill-mode
animation-iteration-count
animation-name
animation-play-state
animation-timing-function
backface-visibility
background
background-attachment
background-blend-mode
background-clip
background-color
background-image
background-origin
background-position
background-repeat
background-size
border
border-bottom
border-bottom-color
border-bottom-left-radius
border-bottom-right-radius
border-bottom-style
border-bottom-width
border-collapse
border-color
border-image
border-image-outset
border-image-repeat
border-image-slice
border-image-source
border-image-width
border-left
border-left-color
border-left-style
border-left-width
border-radius
border-right
border-right-color
border-right-style
border-right-width
border-spacing
border-style
border-top
border-top-color
border-top-left-radius
border-top-right-radius
border-top-style
border-top-width
border-width
bottom
box-decoration-break
box-shadow
box-sizing
caption-side
caret-color
@charset
clear
clip
color
column-count
column-fill
column-gap
column-rule
column-rule-color
column-rule-style
column-rule-width
column-span
column-width
columns
content
counter-increment
counter-reset
cursor
direction
display
empty-cells
filter
flex
flex-basis
flex-direction
flex-flow
flex-grow
flex-shrink
flex-wrap
float
font
@font-face
font-family
font-kerning
font-size
font-size-adjust
font-stretch
font-style
font-variant
font-weight
grid
grid-area
grid-auto-columns
grid-auto-flow
grid-auto-rows
grid-column
grid-column-end
grid-column-gap
grid-column-start
grid-gap
grid-row
grid-row-end
grid-row-gap
grid-row-start
grid-template
grid-template-areas
grid-template-columns
grid-template-rows
hanging-punctuation
height
hyphens
@import
isolation
justify-content
@keyframes
left
letter-spacing
line-height
list-style
list-style-image
list-style-position
list-style-type
margin
margin-bottom
margin-left
margin-right
margin-top
max-height
max-width
@media
min-height
min-width
object-fit
opacity
order
outline
outline-color
outline-offset
outline-style
outline-width
overflow
overflow-x
overflow-y
padding
padding-bottom
padding-left
padding-right
padding-top
page-break-after
page-break-before
page-break-inside
perspective
perspective-origin
pointer-events
position
quotes
resize
right
tab-size
table-layout
text-align
text-align-last
text-decoration
text-decoration-color
text-decoration-line
text-decoration-style
text-indent
text-justify
text-overflow
text-shadow
text-transform
top
transform
transform-origin
transform-style
transition
transition-delay
transition-duration
transition-property
transition-timing-function
unicode-bidi
user-select
vertical-align
visibility
white-space
width
word-break
word-spacing
word-wrap
z-index
Sintaxe
Especificando uma única box-shadow usando:
-
Dois, três ou quatro valores para .
- Se apenas dois valores forem definidos, eles serão interpretados como valores de .
- Se o terceiro valor for dados, é interpretado como .
- Se o quarto valor for dados, é interpretado como .
- Opcionalmente, o atributo .
- Opcionalmente, o valor .
Para especificar mais de uma sombra, separe-as com virgula.
- Se não for especificado, a sombra ganha o efeito de como se a caixa fosse aumentada acima do conteúdo).
A presença da palavra-chave muda a sombra para dentro da moldura (como se o conteúdo estivesse pressionado dentro da caixa). As sombras de inserção são desenhadas dentro da borda (mesmo as transparentes), acima do plano de fundo, mas abaixo do conteúdo. - Existem dois valores (en-US) para configurar o desvio (offset) da sombra:
- especifica a distância horizontal. Valores negativos colocarão a sombra à esquerda do elemento.
- especifca a distância vertical. Valores negativos colocam a sombra acima do elemento.
- Consulte (en-US) para as unidades disponíveis.
- Se ambos os valores forem , a sombra será posicionada atrás do elemento (e poderá gerar um efeito de desfocagem caso e/ou estiverem configurados).
- Este é um terceiro valor para (en-US). Quanto maior for este valor, maior o efeito de desfocagem, desta forma a sombra se tornará maior e mais clara. Valores negativos não são permitidos. Se não for especificado, o valor padrão é (os limites da sombra serão retos). A especificação não inclui um algoritmo exato de como o raio de esmaecimento deve ser calculado, no entanto, descreve o seguinte:
- Este é um quarto valor de (en-US). Valores positivos farão com que a sombra expanda e cresça maior, valores negativos farão com que a sombra encolha. Se não for especificado, o valor padrão é (a sombra terá o mesmo tamanho do elemento)
- Consulte para possiveis palavras-chave e notações. Se não for especificada, a cor que será utilizada vai depender do navegador — geralmente é o valor da propriedade , mas tenha em mente que o Safari atualmente imprime uma sombra transparente neste caso.
Each shadow in the list (treating as a 0-length list) is interpolated via the color (as color) component, and x, y, blur, and (when appropriate) spread (as length) components. For each shadow, if both input shadows are or are not , then the interpolated shadow must match the input shadows in that regard. If any pair of input shadows has one and the other not , the entire shadow list is uninterpolable. If the lists of shadows have different lengths, then the shorter list is padded at the end with shadows whose color is , all lengths are , and whose (or not) matches the longer list.
none
where
where
where
where
CSS Reference
CSS ReferenceCSS Browser SupportCSS SelectorsCSS FunctionsCSS Reference AuralCSS Web Safe FontsCSS Font FallbacksCSS AnimatableCSS UnitsCSS PX-EM ConverterCSS ColorsCSS Color ValuesCSS Default ValuesCSS Entities
CSS Properties
align-content
align-items
align-self
all
animation
animation-delay
animation-direction
animation-duration
animation-fill-mode
animation-iteration-count
animation-name
animation-play-state
animation-timing-function
backface-visibility
background
background-attachment
background-blend-mode
background-clip
background-color
background-image
background-origin
background-position
background-repeat
background-size
border
border-bottom
border-bottom-color
border-bottom-left-radius
border-bottom-right-radius
border-bottom-style
border-bottom-width
border-collapse
border-color
border-image
border-image-outset
border-image-repeat
border-image-slice
border-image-source
border-image-width
border-left
border-left-color
border-left-style
border-left-width
border-radius
border-right
border-right-color
border-right-style
border-right-width
border-spacing
border-style
border-top
border-top-color
border-top-left-radius
border-top-right-radius
border-top-style
border-top-width
border-width
bottom
box-decoration-break
box-shadow
box-sizing
break-after
break-before
break-inside
caption-side
caret-color
@charset
clear
clip
clip-path
color
column-count
column-fill
column-gap
column-rule
column-rule-color
column-rule-style
column-rule-width
column-span
column-width
columns
content
counter-increment
counter-reset
cursor
direction
display
empty-cells
filter
flex
flex-basis
flex-direction
flex-flow
flex-grow
flex-shrink
flex-wrap
float
font
@font-face
font-family
font-feature-settings
font-kerning
font-size
font-size-adjust
font-stretch
font-style
font-variant
font-variant-caps
font-weight
gap
grid
grid-area
grid-auto-columns
grid-auto-flow
grid-auto-rows
grid-column
grid-column-end
grid-column-gap
grid-column-start
grid-gap
grid-row
grid-row-end
grid-row-gap
grid-row-start
grid-template
grid-template-areas
grid-template-columns
grid-template-rows
hanging-punctuation
height
hyphens
@import
isolation
justify-content
@keyframes
left
letter-spacing
line-height
list-style
list-style-image
list-style-position
list-style-type
margin
margin-bottom
margin-left
margin-right
margin-top
max-height
max-width
@media
min-height
min-width
mix-blend-mode
object-fit
object-position
opacity
order
outline
outline-color
outline-offset
outline-style
outline-width
overflow
overflow-x
overflow-y
padding
padding-bottom
padding-left
padding-right
padding-top
page-break-after
page-break-before
page-break-inside
perspective
perspective-origin
pointer-events
position
quotes
resize
right
row-gap
scroll-behavior
tab-size
table-layout
text-align
text-align-last
text-decoration
text-decoration-color
text-decoration-line
text-decoration-style
text-indent
text-justify
text-overflow
text-shadow
text-transform
top
transform
transform-origin
transform-style
transition
transition-delay
transition-duration
transition-property
transition-timing-function
unicode-bidi
user-select
vertical-align
visibility
white-space
width
word-break
word-spacing
word-wrap
writing-mode
z-index
Estamos convertendo nossos dados de compatibilidade para o formato JSON.
Esta tabela de compatibilidade ainda usa o formato antigo,
pois ainda não convertemos os dados que ela contém.
Descubra como você pode ajudar! (en-US)
| Feature | Chrome | Edge | Firefox (Gecko) | Internet Explorer | Opera | Safari |
|---|---|---|---|---|---|---|
| Basic support | 10.0 1.0-webkit (en-US) |
(Yes) | 4.0 (2.0)3.5 (1.9.1)-moz (en-US) | 9.0 | 10.5 | 5.1 3.0 -webkit (en-US) |
| Multiple shadows | 10.0 1.0-webkit (en-US) |
(Yes) | 4.0 (2.0)3.5 (1.9.1)-moz (en-US) | 9.0 | 10.5 | 5.1 3.0 -webkit (en-US) |
| keyword | 10.0 4.0-webkit (en-US) |
(Yes) | 4.0 (2.0)3.5 (1.9.1)-moz (en-US) | 9.0 | 10.5 | 5.1 5.0 -webkit (en-US) |
| Spread radius | 10.0 4.0-webkit (en-US) |
(Yes) | 4.0 (2.0)3.5 (1.9.1)-moz (en-US) | 9.0 | 10.5 | 5.1 5.0 -webkit (en-US) |
| Feature | Edge | Safari Mobile | Opera Mini | Opera Mobile | Android |
|---|---|---|---|---|---|
| Basic support | (Yes) |
5.0(Yes)-webkit (en-US) |
? | (Yes) | (Yes)-webkit (en-US) |
| Multiple shadows | (Yes) | 5.0(Yes)-webkit (en-US) | ? | ? | ? |
| keyword | (Yes) | 5.0(Yes)-webkit (en-US) | ? | ? | ? |
| Spread radius | (Yes) | 5.0(Yes)-webkit (en-US) | ? | ? | ? |
Shadows affect layout in older Gecko, Presto, and WebKit; e.g. if you cast an outer shadow to a box with a of , you’ll see a scrollbar.
Since version 5.5, Internet Explorer supports Microsoft’s DropShadow and Shadow Filter. You can use this proprietary extension to cast a drop shadow (though the syntax and the effect are different from CSS3). In order to get in IE9 or later, you need to set (en-US) to .
Gecko 13 (Firefox 13 / Thunderbird 13 / SeaMonkey 2.10) removed support for . Since then, only the unprefixed version is supported. Shadows affect layout in older Gecko, Presto, and WebKit; e.g. if you cast an outer shadow to a box with a of , you’ll see a scrollbar.
In addition to the unprefixed support, Gecko 44.0 (Firefox 44.0 / Thunderbird 44.0 / SeaMonkey 2.41) added support for a prefixed version of the property for web compatibility reasons behind the preference , defaulting to . Since Gecko 49.0 (Firefox 49.0 / Thunderbird 49.0 / SeaMonkey 2.46) the preference defaults to .
Вариации
Дальше мы будем по-разному изменять цвет фона элемента body. Делаем мы это потому, что для некоторых теней CSS нужен определенный фон, иначе они не будут заметны.
Чтобы текст смотрелся красивее, мы зададим его в верхнем регистре.
Эффект оттиска
Установите для цвета текста немного более темный оттенок, чем фон.
Затем примените небольшую белую тень текста с уменьшенной непрозрачностью:
body {
	background: #222;
}
.text {
	font-size: 5em;
	color: rgba(0,0,0,0.6);		/* цвет текста */
    text-shadow: 2px 2px 3px rgba(255,255,255,0.1);	/* добавление тени */
}
Используя код RGBA, вы можете установить непрозрачность цвета
Обратите внимание на то, что цвет текста имеет непрозрачность 60% (0.6), а тени div CSS 10% (0.1)
Эффект оттиска букв
Расширенное задание параметров box-shadow
В этом свойстве можно так же указать размытие и цвет тени блока. В этом случае наше свойство будет выглядеть вот так:
CSS
box-shadow: 10px 10px 5px #cccссс;
| 1 | box-shadow10px10px5px#cccссс; |
Значение 5px задает размытие тени, а #cccссс – цвет тени в шестнадцатеричной системе.
Для задания смешения и размытия мы можем указывать величину в пикселях или относительных единицах измерения (em).
Цвет так же можно задавать различными способами. Мы можем задать цвет тени шестнадцатеричным значением, использовать формат RGB или же можно задать полупрозрачную тень с помощью формата RGBA. Например, вот так:
CSS
box-shadow: 10px 10px 5px rgba (120,120,120,0.5);
| 1 | box-shadow10px10px5pxrgba(120,120,120,0.5); |
Здесь первый три цифры (120,120,120) – это значения цветов красный, зелёный, синий.
Последнее число (0.5) – это уровень прозрачности, который может иметь значения от 0 до 1
Для точного определения шестнадцатеричного значения цвета вы можете воспользоваться одним из инструментов, описанных в этой статье.
И тогда мы получим такой результат:
Красивая тень CSS3
Использование нескольких теней одновременно
Так же вы можете сделать несколько теней для одного блока одновременно. Например, можно поставить тень снизу, по бокам и внутри элемента. В этом случае параметры нужно записать через запятую:
PHP
box-shadow: 10px 0px 5px -5px #555,
-10px 0px 5px -5px #555,
0px 10px 5px -10px #555,
inset 0px 0px 2px;
|
1 |
box-shadow10px0px5px-5px#555, -10px0px5px-5px#555, 0px10px5px-10px#555, inset0px0px2px; |
Обратите внимание! В этой записи у нас добавился еще один параметр – размер тени, который указан перед значением цвета. Теперь настройки указаны в следующей последовательности: смешение по горизонтали, смещение по вертикали, размытие, размер тени и её цвет.. Вот как это выглядит:
Вот как это выглядит:
Сложная тень CSS3
Еще один момент! Так как свойство box-shadow относится к разряду свойств CSS3, то оно может не поддерживаться более старыми версиями браузеров, поэтому если вам нужно сделать коссбраузерную верстку с поддержкой теней, то свойство box-shadow нужно задавать для каждого браузера со специальными кроссбраузерными префиксами:
PHP
-webkit-box-shadow: 10px 0px 5px -5px #555, -10px 0px 5px -5px #555,0px 10px 5px -10px #555, inset 0px 0px 2px;
-moz-box-shadow: 10px 0px 5px -5px #555, -10px 0px 5px -5px #555,0px 10px 5px -10px #555, inset 0px 0px 2px;
-o-box-shadow: 10px 0px 5px -5px #555, -10px 0px 5px -5px #555,0px 10px 5px -10px #555, inset 0px 0px 2px;
-ms-box-shadow: 10px 0px 5px -5px #555, -10px 0px 5px -5px #555,0px 10px 5px -10px #555, inset 0px 0px 2px;
|
1 |
-webkit-box-shadow10px0px5px-5px#555, -10px 0px 5px -5px #555,0px 10px 5px -10px #555, inset 0px 0px 2px; -moz-box-shadow10px0px5px-5px#555, -10px 0px 5px -5px #555,0px 10px 5px -10px #555, inset 0px 0px 2px; -o-box-shadow10px0px5px-5px#555, -10px 0px 5px -5px #555,0px 10px 5px -10px #555, inset 0px 0px 2px; -ms-box-shadow10px0px5px-5px#555, -10px 0px 5px -5px #555,0px 10px 5px -10px #555, inset 0px 0px 2px; |
-webkit – для вебкит браузеров (Яндекс-браузер, GoogleChrome, новая версия Opera и т.д.)
-moz – для Mozilla Firefox
-о – для старых версий Opera
-ms — для Internet Explorer 8
Также должна вас предупредить, что даже использование кроссбраузерных префиксов не даст вам 100% гарантии отображения теней во всех старых браузерах.
Как видите, сделать с помощью CSS тень для блока не так уж и сложно. Главное понять какой параметр за что отвечает, и, подключив фантазию, вы сможете сделать очень интересное оформление для своего сайта. На мой взгляд, сайты с грамотно расставленными тенями для элементов выглядят очень красиво.
Так же, при помощи box-shadow можно сделать реалистичную тень блока CSS разной сложности, но для этого нужно использовать дополнительные приемы. Поэтому, созданием таких теней мы займемся в следующий раз.

С уважением Юлия Гусарь